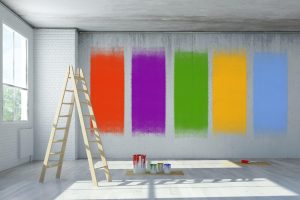
Painting the home interior can be an exciting project, offering the opportunity to refresh your living space and add a personal touch to your environment. However, with proper planning and execution, it can quickly turn into a smooth and enjoyable experience. Following some fundamental dos and don’ts is essential to ensuring your painting project goes smoothly and yields professional-looking results.
The Dos:
Do Plan and Prepare:
Before you start painting, take the time to plan out your project. This includes selecting the right paint colours, purchasing high-quality paint and supplies, and preparing the surfaces to be painted by cleaning and repairing any imperfections.
Do Test Paint Colors:
Paint colours can look different in various lighting conditions and against different backgrounds. Before committing to a colour, test it by painting a minor area or using swatches to see how it looks in your space.
Do Use High-Quality Paint and Tools:
Investing in high-quality paint and tools can make a significant difference in the outcome of your project. Quality paint will provide better coverage and durability, while good brushes and rollers will help you achieve smoother, more even coats.

Do Prime First:
Applying a primer before painting can help improve adhesion, hide imperfections, and ensure better coverage. Use a primer suitable for the surface you’re painting, whether it’s drywall, wood, or previously painted walls.
Use Proper Painting Techniques:
Start by cutting in around the edges of the walls, and then fill in the larger areas with a roller for a smooth, consistent finish. Work in small sections and maintain a wet edge to avoid visible seams and roller marks.
Do Protect Your Floors and Furniture:
Cover your floors and furniture with drop cloths or plastic sheeting to prevent paint splatters and spills. Remove any hardware or cover it with painter’s tape to protect it from drips and splashes.
Do Clean Up Properly:
Once you’ve finished painting, thoroughly clean your brushes, rollers, and other tools with soap and water or the appropriate cleaning solution. Proper cleanup will help prolong the life of your painting equipment and ensure it’s ready for future use.
The Don’ts:
Don’t Skip Surface Preparation:
Proper surface preparation is essential for achieving a professional-looking paint job. Avoid skipping steps like cleaning, sanding, and patching holes, as this can result in uneven coverage and adhesion issues.
Don’t Rush:
Painting requires patience and attention to detail. Rushing through the process can lead to sloppy results, including drips, streaks, and uneven coverage. Take your time and focus on achieving smooth, even coats for the best outcome.
Don’t Overload Your Brush or Roller:
Excess paint on your brush or roller can lead to drips and uneven coverage. Use enough paint to cover the surface without saturating it, and reload your brush or roller to maintain a consistent application.
Don’t Paint Over Moisture or Mold:
Painting over damp or mouldy surfaces can trap moisture and lead to mould growth beneath the paint, causing more significant problems. Address moisture issues and properly treat mould before painting to ensure a clean, healthy environment.
Don’t Neglect Cleanup:
Leaving paint cans open or brushes in the paint can lead to messy spills and wasted materials. Take the time to clean up properly after each painting session to keep your workspace tidy and organized.
By following these dos and don’ts, you can ensure a successful interior painting project that enhances the beauty and comfort of your home for years to come. With careful planning, preparation, and execution, you’ll achieve professional-quality results that you can be proud of.